Intro to apps
Custom Visibility for Apps
Messages App
Payments App
Services
Invoicing
Subscriptions
Payment Links
Store
Client Billing Experience
Fees & Payment Reconciliation
Files App
Contracts App
Forms App
Helpdesk App
Tasks App
Client Home App
Profile Manager App
Airtable Embed
Calendly Embed
Notion Embed
Google Sheets Embed
ClickUp Embed
Typeform Embed
Youtube Embed
Autoresponder App
Exporter App
QuickBooks Integration
Xero Integration
Other Embeds
Jotform Embed
Power BI Embed
Hubspot Forms Embed
Hubspot Meetings Embed
Miro Embed
Figma Embed
Monday Embed
Canva Embed
Acuity Scheduling Embed
Loom Embed
Google Drive Embed
Google Slides Embed
Google Docs Embed
Google Forms Embed
Looker Studio Embed
Google Calendar Embed
Databox Embed
Trello Embed
Zoom Scheduling Embed
Squarespace Embed
OneDrive Embed
Store
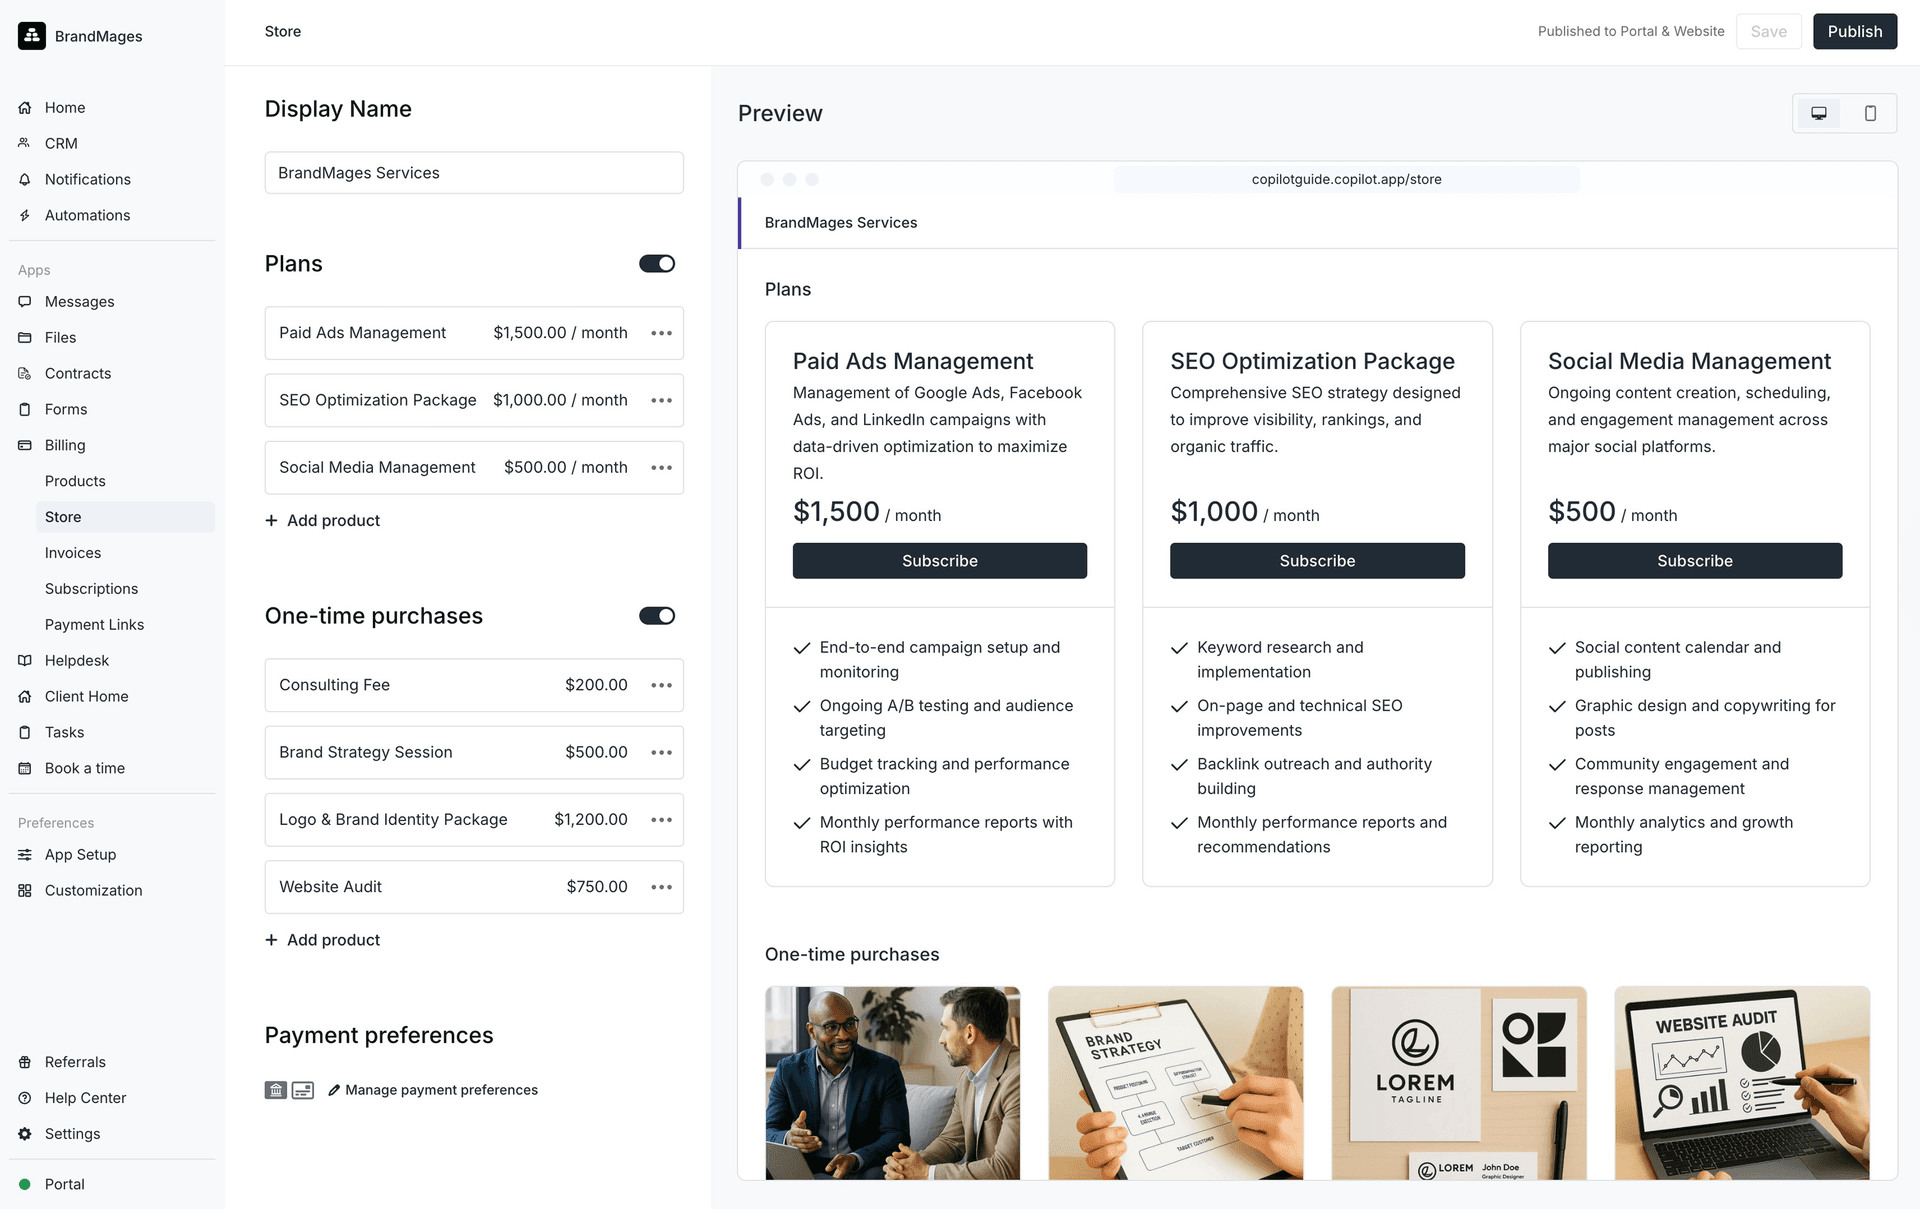
Our Store feature lets you turn your services into clear, transparent packages that clients can purchase directly through a modern online storefront.
It brings the benefits of eCommerce to your service business by allowing you to showcase your offerings, set upfront pricing, and make it easy for clients to understand exactly what they’re getting. This builds trust and helps you get paid faster.
Your store is a customizable digital storefront that can be shared privately with existing clients through their portal or published publicly for new clients to self-purchase. Once someone completes checkout, they’re automatically brought into the client experience with no extra steps.
Creating your Store
Before setting up your store, you’ll need to create your services. These can be one-time services, recurring services, or both.
Follow the instructions in the Services section to create your services. Once your services are set up, follow the steps below to complete your store setup. While building your store, you can preview how it will appear on both desktop and mobile views.
Navigate to the Payments app.
Open the Store tab.
Enter the name of the store
You can add recurring services under Plans and one-time services under One-time purchases. Both sections will be visible by default. If you don’t want to offer one of them, you can turn it off using the toggle next to the section title.
To add a recurring service under Plans:
Click the text box and select a service from the dropdown.
Optionally add a description.
Select a price.
Optionally add features for this plan.
Click Save
To add another recurring service, click + Add service.
NOTE: You can add up to four recurring services in your store.
To add a one-time service under One-time purchases:
Click the text box and select a service from the dropdown.
Optionally add an image.
Select a price
Optionally add a description
Click Save
To add another recurring service, click + Add service.
To configure payment preferences, click Manage payment preferences and choose:
Whether to allow credit card payments, ACH payments, or both.
Whether you or your client will pay the processing fees.
Click Save at the top right of the page to apply your changes.
Publishing your Store
Click Publish at the top right of the page and choose where your store will be visible:
Enable Portal to show the store to logged-in clients in their portal.
Enable Public website to generate a public link that you can share. Enabling this setting will generate your public link, which you can copy and share.
Once you’ve made your selections, click Publish.
NOTE: In a future update, you’ll be able to generate an embed code to add your store to your marketing site.
Editing your Store
To edit a plan or one-time service, click the ellipsis (⋯) next to the item and select Edit item.
To delete a service, click the ellipsis (⋯) and select Remove item.
To reorder your services, click the ellipsis (⋯) next to any service and select Move up or Move down.