
Client Home
A homepage for your clients. Personalize their onboarding experience with autofill fields, and aggregate notifications for the tasks they have to complete.
Type
App
App Visibility
Client
Pricing
Free
Built by
Overview 
With Client Home, you can create a dynamic homepage for your clients within your portal. Use it to share announcements, introduce your firm, and set expectations for working together. You can personalize the experience using properties and custom fields from Assembly CRM, such as greeting clients by name or displaying client-specific information. You can also create segments to build different versions of your Client Home for specific groups of clients, allowing for a more tailored experience. When Actions are enabled, the Client Home highlights items that require attention, like invoices, contracts, tasks, or forms, with direct links to complete them.
App setup
Go to App Library, and click + Add an app in the top right corner.
Select Client Home in the Client Apps section.
After clicking on the app, click on Install in the top-right.
Set a title and icon that represent the app, and then click the “Add” button on the top right. We recommend setting up the page before enabling the app for your clients. To enable the app after adding it, click the ellipses on the top right page of the Client Home app and go to “Edit app setup.”
Go to App Setup and drag your Client Home App to the top to ensure this is the first app your clients see when they log into their portal.
Setting up your Client Home
Your initial setup includes a sample layout to help you get started. From there, you can build a dynamic Client Home page tailored to each client by adding text, images, and autofill fields for personalized content. You can also use segments to create different versions of your Client Home for specific groups of clients.
On the left side of the Client Home App, you add content your clients will engage with, while the right side offers tools for deep customization, including the integration of Dynamic Fields and creating Segments.
Segments
Segments allow you to create different versions of your Client Home for different types of clients. By default, all clients see the same content. With segments, you can customize the experience based on custom field tags.
You can create up to 5 Client Home variants per workspace. Each client will only see one version of the Client Home based on the rules you set. Page visibility is controlled using tag-based rules tied to your custom fields.
Create a Segment
Click Segments on the side of the app
Click Create Segment
Enter a name for your segment
Select the tag under Show this segment if Tags is
(Optional) Click + OR to include additional tags
Click Create
Edit or Delete a Segment
Click Segments on the side of the app
Hover over the segment you want to update
Click the menu button (...)
Select Update Segment to edit or Delete Segment to remove it
Setting up Your Client Home
To begin, make sure you are in Editor mode by clicking Editor at the top of the page.
If you want to edit a specific segment, use the Segment dropdown found on top to select the segment you’d like to update. Selecting Default means you are editing the version that all clients will see if they are not part of a segment.
Adding Content
There are two ways to add and format content in your Client Home:
Use the text editor at the top of the page
Type “/” to open a quick menu with all available options
Both methods give you access to a variety of tools to help you build and organize your content:
Heading 1, 2, 3: Structure your page with clear headings.
Text: Add standard text content
Autofill Fields: Insert dynamic, client-specific information
Bullet List, Numbered List: Organize information in list formats
Upload: Easily add images or files to your page
Table: Create structured data presentations
Callout: Highlight important information with emphasis
Divider: Separate sections for better readability
Embed: Integrate apps such as Calendly or a Google Doc
Selecting Embed prompts an input for you to enter the link of the item you want to include. Once added, it becomes part of your page, enhancing it with functional, directly accessible content.
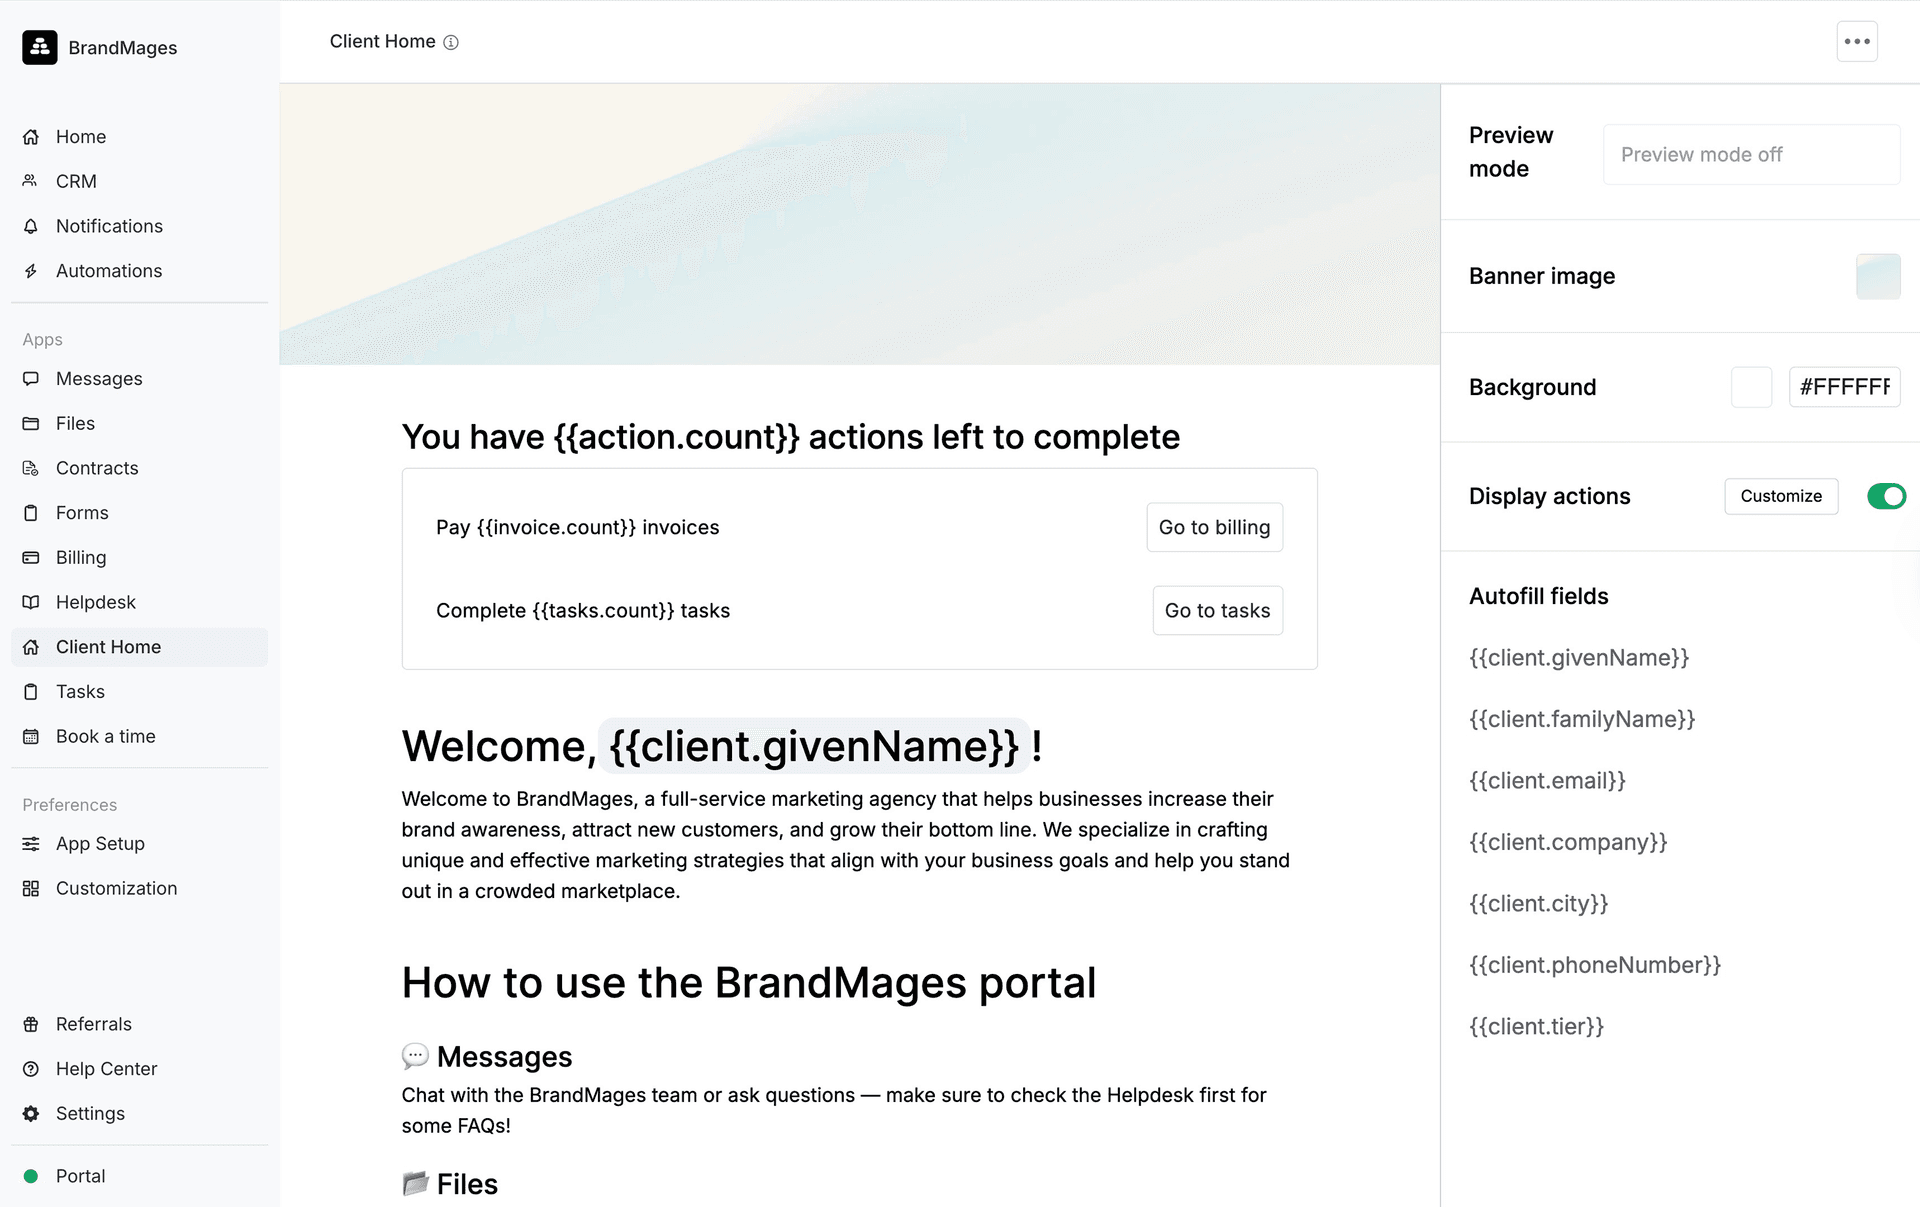
Dynamic fields
Dynamic fields enhance personalization, automatically displaying client-specific information like names or custom data. These fields draw from your existing client data, ensuring a tailored experience upon each client's login.
Two Ways to Add Autofill Fields:
Type “/,” select “Autofill fields,” and choose your field.
Click Dynamic fields shown on the right of the client home app, and it will appear on the page.
Actions
Use this setting to control what appears in the Actions section for your clients.
Toggle each item on or off to choose which types of actions your clients can see:
Invoices
Forms
Contracts
Tasks
When enabled, clients will see items that require their attention within each selected category, such as paying an invoice, signing a contract, completing a task, or submitting a form.
Each category displays a count based on the client’s outstanding items, giving them a clear view of what needs to be completed.
You can also reorder these items to control how they appear in the Actions section.
Style Customization
You can personalize your homepage's look with a custom banner and background colors, creating an inviting and branded environment for your clients.
You have two ways to customize your Client Home:
Banner Image: Upload an image that represents your company. To update it, click the banner on the right side of the app and select Change Banner. To adjust how the image appears, select Reposition Banner.
Background Color: Choose a background color that aligns with your brand and enhances the overall look and feel. To update it, click Background Color on the right side of the app, then select a color from the picker or enter a hex code.
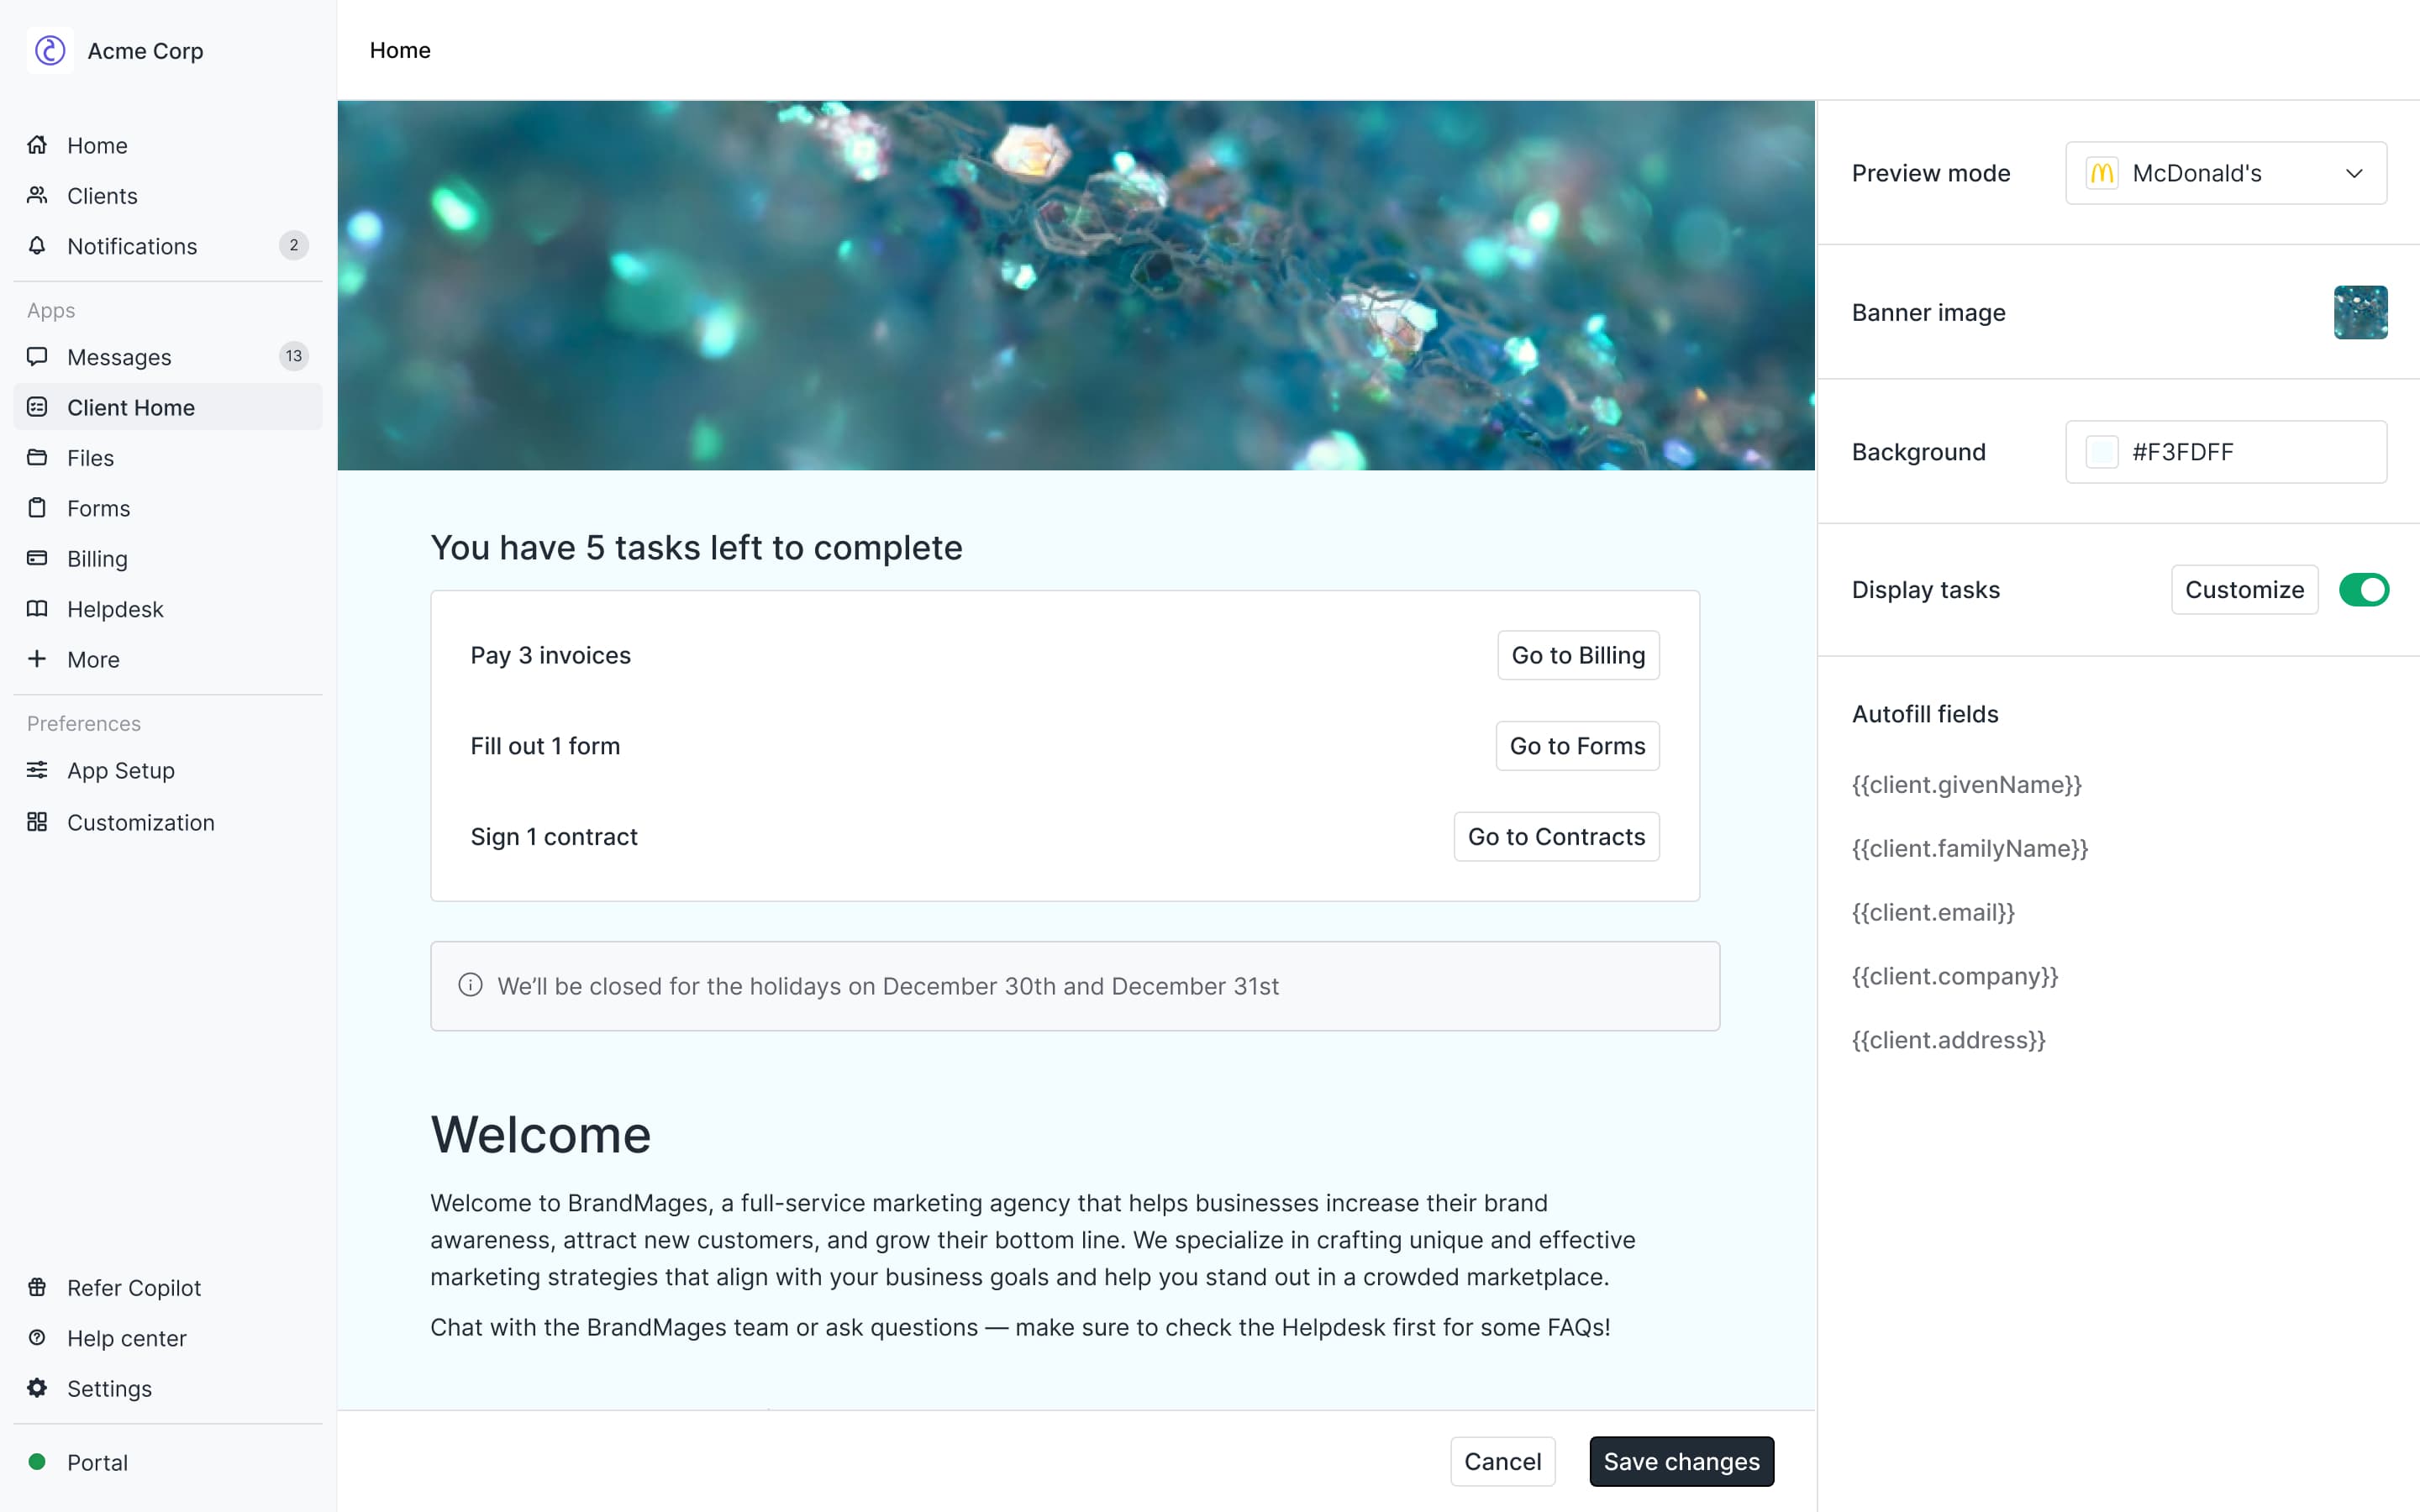
Preview Mode
Preview Mode allows you to view the Client Home as your client would see it.
To preview a specific client’s homepage, click Preview at the top of the page, then select a client from the dropdown.
Client experience
Clients will see a customized, view-only portal with relevant autofill information and assigned actions. This ensures they only see what has been set up for them. If a client belongs to a segment, they will see the corresponding version of the Client Home.
When Actions are enabled, clients can view the number of outstanding items they need to complete, such as invoices to pay, contracts to review, or forms to submit. Each item includes a direct link to the relevant app, making it easy to take action.
Your clients deserve better.
Try for free for 14 days, no credit card required.